Adhesives · Reference table · 3 min read
Adhesives: Contact Cement, Open Time and the Ventilation Rule
Contact cement is the strongest and the most misused adhesive on this bench. It bonds on contact with itself, which means you get one chance to position a panel and no chance to slide it. Everything about working with it — open time, the roller, the test — follows from that single property.
Hole array drawn from the spacing in the spec table; dimensions in millimetres.
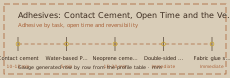
Reference table Adhesive by task, open time and reversibility
| Adhesive | Open time | Bonds | Reversible | Use |
|---|---|---|---|---|
| Contact cement | 10–15 min | Leather to leather, leather to lining | Yes, with heat | Permanent bonds, laminated panels |
| Water-based PVA | 5 min | Leather to paper, patterns | Yes, with water | Temporary holding, pattern mounting |
| Neoprene cement | 15–20 min | Leather to rubber, sole work | Difficult | Soles, heavy laminated stacks |
| Double-sided tape | Immediate | Leather to leather, temporary | Yes, peel | Holding pieces while stitching |
| Fabric glue stick | Immediate | Lining to lining, light | Yes | Positioning suede linings |
Bench sequence in the order the bench asks for it
Open time is a range, not a number
Contact cement needs to dry until it is tacky but not wet: ten to fifteen minutes at 20 degrees and 50 percent humidity. Touch it with a knuckle — if it transfers to your skin, it is too wet and the bond will slip. If it is dry to the touch and no longer sticky, it has gone past and will bond weakly.
Humidity moves this window more than temperature does. On a damp day, open time stretches to 25 minutes and the temptation is to bond early. Bonding early on a damp day is the most common cause of a lining that creeps 2 mm out of alignment a week later.
Two coats on porous leather
Veg-tan leather drinks the first coat. On a rough flesh side, apply a thin first coat, let it dry completely, then apply the second coat and bring it to tack. One heavy coat sinks in unevenly, leaves dry patches at the edges and produces a bond that fails at the perimeter first.
Use a scrap of leather or a roller to spread it, not a brush with stiff bristles that leaves ridges. Ridges in the cement telegraph through a laminated panel as visible bumps, and on a 1.2 mm wallet shell you will see every one of them once the leather is burnished.
Bond from the centre outward
Line the pieces up dry first, mark both with an awl at two points, then bond from the centre outward with a roller or a bone folder. Working from the centre pushes air to the edges; working from one end traps it and gives a visible bubble in the middle of the panel.
For a large panel, use a slip sheet: lay a sheet of paper between the glued faces, align the edges, then pull the paper out 30 mm at a time and roll that section down. This is the only reliable way to bond a 380 mm bag panel without a bubble.
Ventilation, and un-bonding
Contact cement is a solvent adhesive and the solvent is not optional — it is what keeps the polymer fluid. Work with the window open and a fan moving air across the bench, and if you are doing more than about half an hour of bonding, wear a respirator rated for organic vapour. Headaches after an afternoon of laminating are a ventilation problem, not a coincidence.
A bond made with contact cement can be undone with heat. Play a heat gun over the joint, keep the nozzle moving, and slide a thin palette knife into the seam as the cement softens at about 60 degrees. Do not pull: pulling stretches the leather, while sliding the knife separates the bond.
Also filed under Adhesives
Blades · 2026-10-12
Cutting Tools: What Each Blade Is Actually For
Most bench injuries come from using the wrong blade on the wrong cut.
- Reference table
- 5
-
- Reference table
- 4
Hardware · 2026-09-30
Hardware Finishes and What They Do After Two Years
Hardware is the part of a leather good that fails first and looks worst when it does.
- Reference table
- 6
Edge Finishing · 2026-09-21
The Edge Finish Stack: Bevel, Sand, Seal, Wax
An edge is four operations, in order, and skipping any one of them shows.
- Reference table
- 5
Bags & Pouches · 2026-10-14
A Boxed Dopp Kit: Five Panels, Four Corners, Two Hands
A dopp kit is the first order where you build a three-dimensional object rather than a folded one.
- Bench hours
- 14 h
Cases & Covers · 2026-10-09
Wet-Moulded Axe Sheath With a Stitched Welt
The one rule of an axe sheath is that the blade must never touch the stitch line.
- Bench hours
- 9 h
Belts & Straps · 2026-10-03
A Padded Dog Collar Built From Two Layers
A collar takes more load than any belt on this bench.
- Bench hours
- 6 h