Edge Finishing · Reference table · 3 min read
The Edge Finish Stack: Bevel, Sand, Seal, Wax
An edge is four operations, in order, and skipping any one of them shows. Cut leather has a square corner with a raw, fibrous face; the beveler removes the corner, the sandpaper flattens the fibres, the sealer binds them, and the wax or paint protects the result. Do them out of order and the edge will be fuzzy in a month.
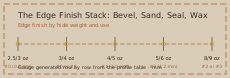
Hole array drawn from the spacing in the spec table; dimensions in millimetres.
Reference table Edge finish by hide weight and use
| Hide weight | Beveler | Grit sequence | Finish | Result |
|---|---|---|---|---|
| 2.5/3 oz | #0 (0.8 mm) | 600 then 1000 | Gum only | Rounded, dark, soft edge |
| 3/4 oz | #0 or #1 | 400 then 800 | Gum, or 1 coat paint | Clean edge, no bulge |
| 4/5 oz | #1 (1.0 mm) | 400 then 800 | 2 coats edge paint | Painted edge, crisp corners |
| 5/6 oz | #2 (1.2 mm) | 400 then 800 | 2 coats edge paint | Hard-wearing, weather resistant |
| 8/9 oz | #2 or #3 | 240 then 400 | Gum plus wax | Rounded working edge |
Bench sequence in the order the bench asks for it
Bevel first, and match the size to the hide
A #0 beveler takes 0.8 mm off the corner, #1 takes 1.0 mm, #2 takes 1.2 mm. On 1.2 mm wallet leather, a #2 beveler removes more than half the edge — the leather goes translucent and tears at the next stress. Undersize the beveler rather than oversize it: an under-beveled edge can be taken down again, an over-beveled one cannot be put back.
Bevel in one continuous pull per edge, not in short strokes. Short strokes leave scallops that sanding will not remove, and on a wallet perimeter 300 mm long you will see every one of them in raking light.
Sand in two grits, damp between them
400 grit takes the tool marks out, 800 grit closes the fibres. Wipe the edge with a damp sponge between the two grits. Damping raises the fibres so the 800 grit cuts them rather than just polishing over the top of them, and it is the difference between an edge that stays smooth and one that goes fuzzy in humid weather.
Sand along the edge, never across it. Cross-sanding on a 1.2 mm edge rolls the corner back over and undoes the bevel you just cut. Wrap the paper around a flat block or a piece of scrap leather for a straight run; use your finger for curves but keep the direction consistent.
Seal: gum, wax or paint
Gum tragacanth is a plant gum that dries hard and is rubbed in with canvas. It darkens the edge, keeps it flexible and re-burnishes itself with use. It is the right finish for belts, collars, aprons and anything that will be bent repeatedly — flexible objects crack painted edges.
Edge paint is a flexible acrylic that sits on top of the fibres. Two thin coats, twenty minutes apart, applied with a roller pen and then flattened with a warm creaser. Paint is right for wallets, card holders and bags, where the edge is visible and needs to be crisp. Never paint an edge that will fold.
The 24-hour rule and the repair
Edge paint needs 24 hours to reach full hardness. Handling a freshly painted edge at four hours will mark it in a way that cannot be polished out. Leave painted items flat, not hanging, and do not put them in a bag for a day.
To repair a chipped painted edge, do not paint over the chip. Sand the whole edge back to 600 grit, re-bevel lightly if the corner has rolled, and repaint the entire edge. Spot repairs show as a lump within a month and are more visible than the original chip.
Also filed under Edge Finishing
Adhesives · 2026-10-18
Adhesives: Contact Cement, Open Time and the Ventilation Rule
Contact cement is the strongest and the most misused adhesive on this bench.
- Reference table
- 5
Blades · 2026-10-12
Cutting Tools: What Each Blade Is Actually For
Most bench injuries come from using the wrong blade on the wrong cut.
- Reference table
- 5
-
- Reference table
- 4
Hardware · 2026-09-30
Hardware Finishes and What They Do After Two Years
Hardware is the part of a leather good that fails first and looks worst when it does.
- Reference table
- 6
Bags & Pouches · 2026-10-14
A Boxed Dopp Kit: Five Panels, Four Corners, Two Hands
A dopp kit is the first order where you build a three-dimensional object rather than a folded one.
- Bench hours
- 14 h
Cases & Covers · 2026-10-09
Wet-Moulded Axe Sheath With a Stitched Welt
The one rule of an axe sheath is that the blade must never touch the stitch line.
- Bench hours
- 9 h
Belts & Straps · 2026-10-03
A Padded Dog Collar Built From Two Layers
A collar takes more load than any belt on this bench.
- Bench hours
- 6 h